
Maintained by: Elisa E. Beshero-Bondar
(eeb4 at psu.edu)  Powered by firebellies.
Powered by firebellies.Learning how to create and publish a website involves:
In this class we are working with GitHub Pages, a web hosting service freely provided by GitHub associated with your GitHub repository. This exercise is one of a pair of exercises that will help you get started with configuring a GitHub Pages website built on your own code as you are learning HTML and CSS.
docs directoryBe sure you have cloned your own repo in the same directory that holds the textEncoding-Hub. In our tutorials we have asked you to create a GitHub directory to contain your GitHub repos. Either work with the personal GitHub repo you created already, or make a new one for the semester project. The file directory structure we expect on your computer is:
            GitHub
                |
                — textEncoding-Hub
                — myCoolRepo
If everything looks okay with your setup, let’s begin. First, you need to retrieve a copy of my starter web folder. Open your Git Bash Shell (on Windows) or your Terminal on Mac. Navigate on your computer to your local clone of the textEncoding-Hub, and before you do anything else, use git pull to update your repo files so you bring in the latest commits to your local computer.
Because we want GitHub to function as a place to store and share code, as well as publish a website, we will configure GitHub Pages to publish from a special directory in the repo, which must be named docs. I have a starter prepared for your docs folder with some files you can begin to customize to make a website. My folder is in the textEncoding-Hub on this relative path:
textEncoding-Hub/docs/copy-and-rename-to-docs
This copy-and-rename-to-docs folder will need to be renamed docs when you copy it to your repo.
To copy the folder we can use the shell command cp and practice some file navigation to place the folder at the top level inside your repo. If your repo is named, “myCoolRepo”, you would put the folder here and rename it docs:
            myCoolRepo
                |
                — docs
So its local file path would be something like: /path/on/your/computer/to/GitHub/myCoolRepo/docs.
If your directory structure is like the one we recommend in our GitHub tutorials, you will be able to copy and rename the directory in one move with the cp command as we show you below. (If your file directory structure is different you will need to customize our commands here.)
cd command, so your command prompt is at myCoolRepo.git pull here just in case you made changes to your repo from another computer.cp command with an -r flag like this to allow it to copy a directory from the textEncoding-Hub into your space, realizing that ../ climbs up a directory, and that you can use the tab key to autocomplete long directory names. (The ./ in the second argument means right here on myOwnCoolRepo.)
cp -r ../textEncoding-Hub/docs/copy-and-rename-to-docs ./docs
cp command, there is nothing at all wrong with using your File Manager (Windows) or Finder (Mac) to copy the directory over and rename it. Just please be sure to copy rather than move the directory! Leave a copy of the directory in the textEncoding-Hub rather than deleting it so you do not change our class GitHub repo. Be sure not to push any changes to the textEncoding-Hub.)git add -A (or git add .) Note: git add -A is a little more powerful than git add . in that it ensures that deleted files are tracked, but usually they are interchangeable. Use whichever one you prefer.git commit -m "adding docs folder to start GitHub website"git pushGo visit your remote GitHub repo on the web to see that your commit history is updated and your new docs folder is ready to serve a website. Next we will need to activate GitHub Pages on your remote repo.
In the web browser, as you are visiting your remote repo, find and open the Settings tab. The Settings tab is in the upper right, just above the green Code button.
You will see the main view of Settings. Scroll down on this page until you see the GitHub Pages heading, which will look like this:
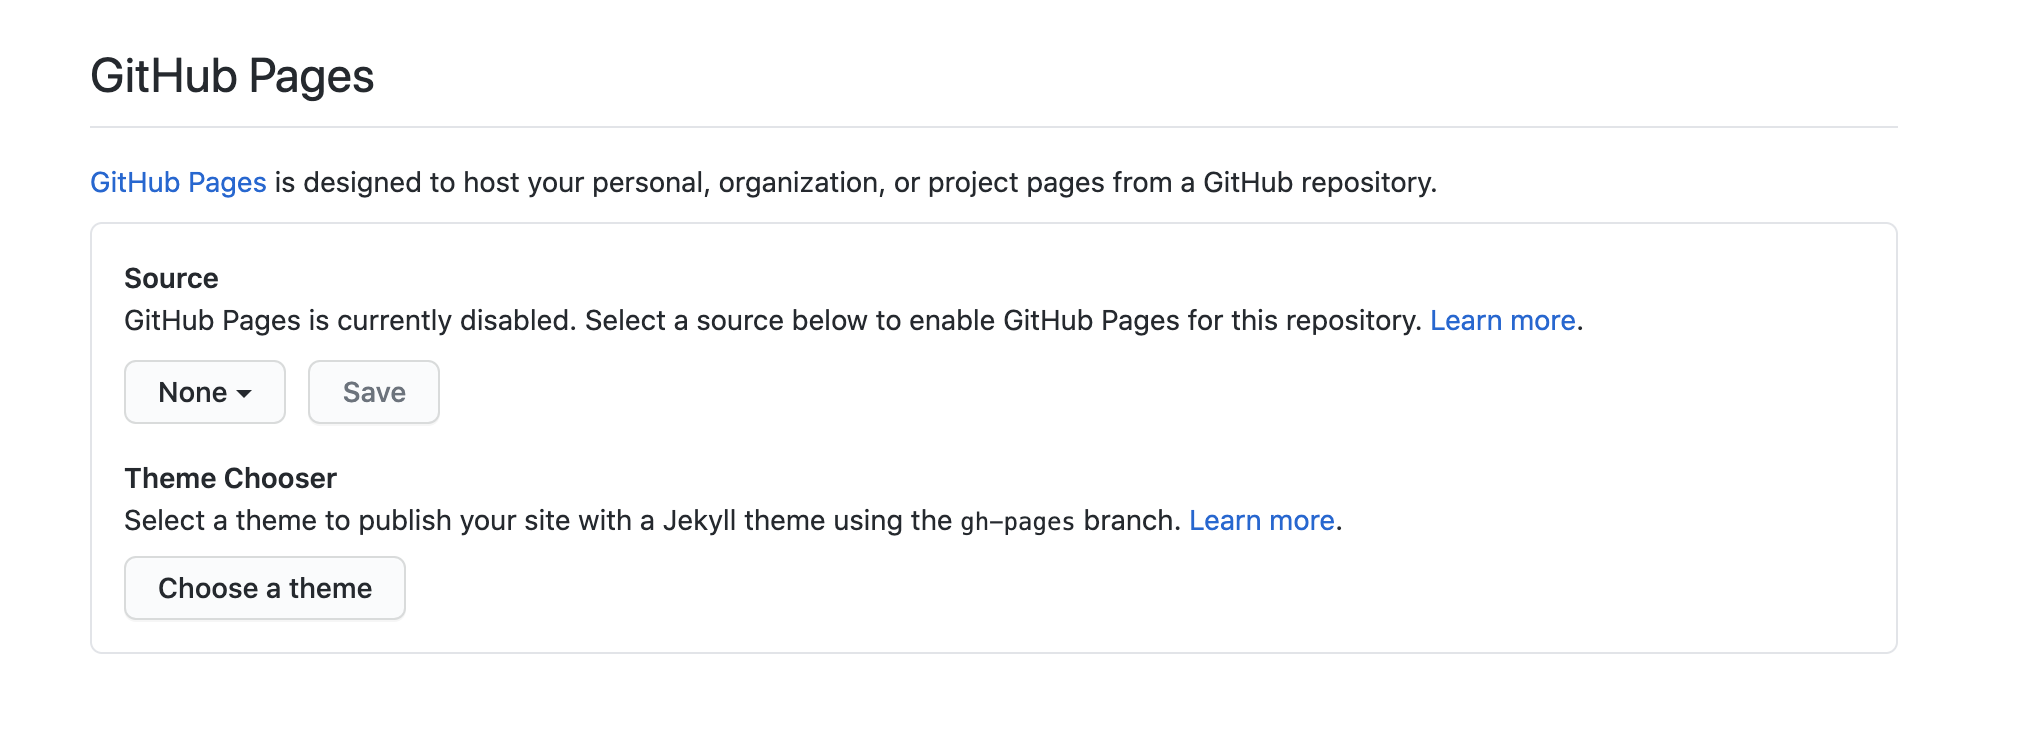
Configure your settings to look like mine in the screen capture below. They should be to serve GitHub Pages from Branch:master, and the docs/ directory.
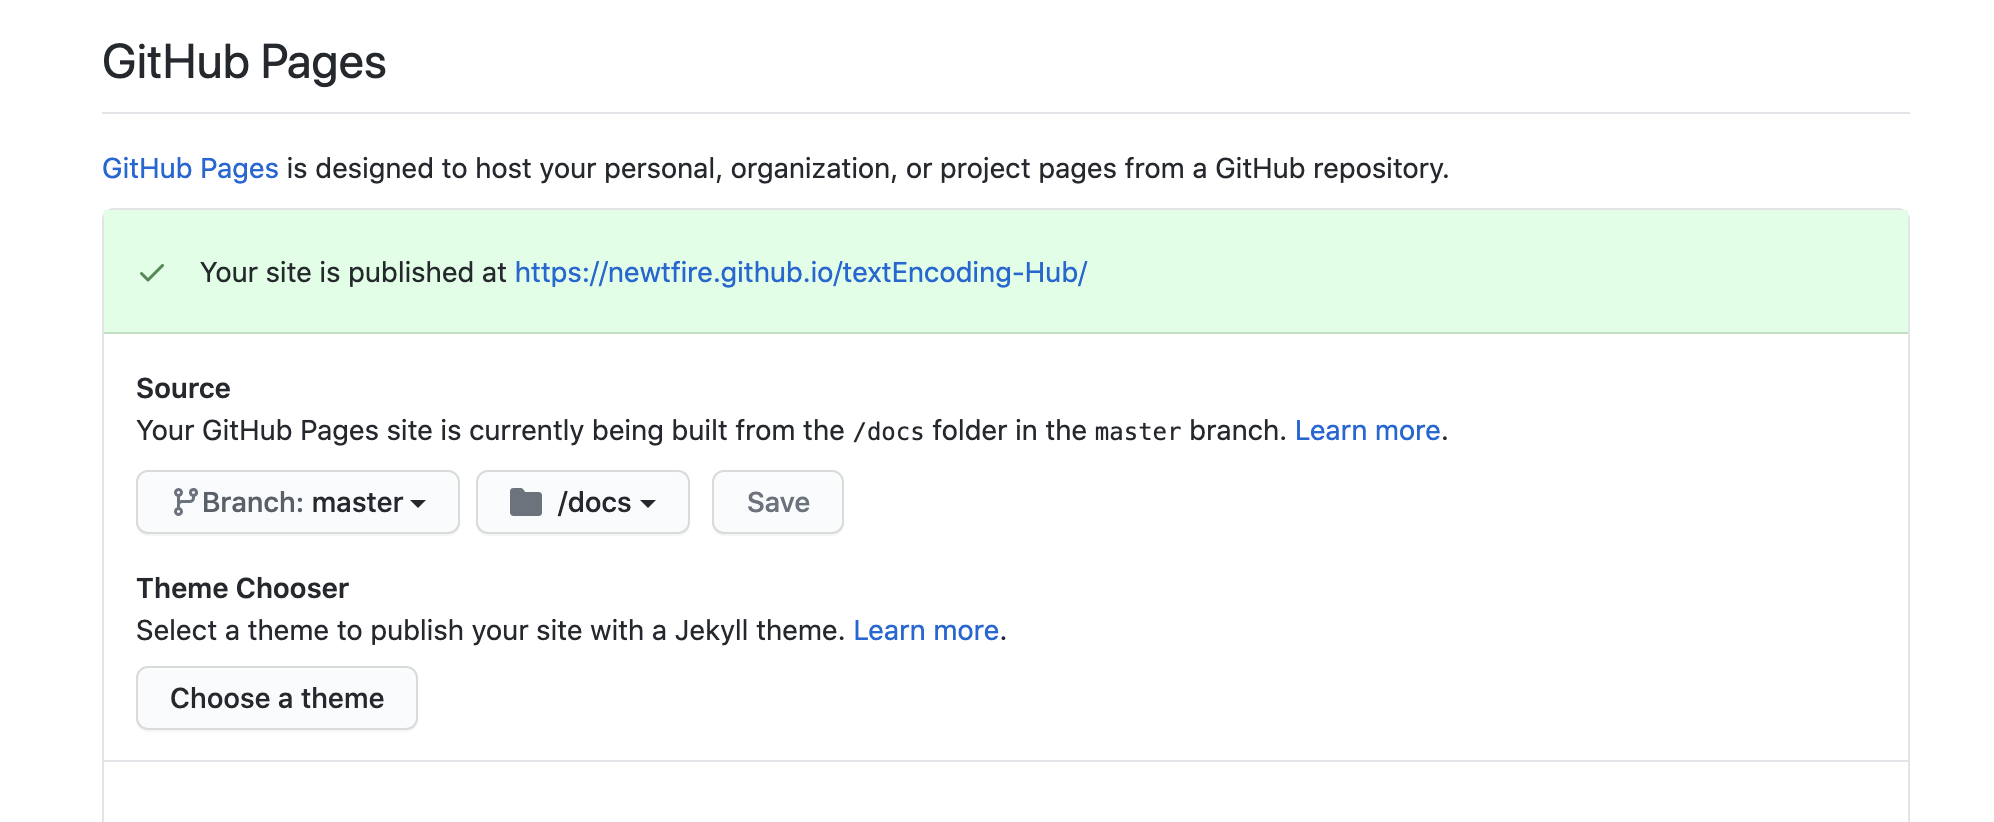
When you have altered this setting, your site will be published from the URL listed in the now pale-green box in your GitHub settings. You may wish to copy that link, and paste it on the code view of your repo in the About window. Paste that URL in a web browser to view your published site, and use that URL to direct visitors to your site. Caution: GitHub Pages can take sometimes up to 10 minutes to update after a git push of your latest work, so be patient. Also try opening your site in different web browsers to refresh the view.
For our first assignment you may simply edit the index.html page that you now have stored in your docs/ folder on your GitHub repo.
The goal of this assignment is to create a very basic personal webpage. If you view page source on this page you can see examples of how we used headings, paragraphs, lists, an image, and links to other pages within the same directory. You can also view the corresponding CSS and take note of how we linked our CSS with this page. Mac users to view page source we recommend that you use Firefox or Chrome because Safari will require you to change browser preferences to see the page source. In Firefox or Chrome simply right-click and select view page source.
The key components of your first basic webpage that we will be looking for are:
If you wish, study our Introduction to CSS and begin updating and revising and adding more styling to your page by editing the CSS file.
If you wish, try adding a new page to link to your index.html page, using a relative link. In oXygen, open a new XHTML 5 file, and alter the head element to contain the info below. This page will link to the same CSS file, webstyle.css currently associated with your index.html page. When you go to save this file give it a new name with no spaces that makes sense within your site, like about.html, or hobbies.html. oXygen will want to save this as .xhtml by default, but be sure to change the file extension to .html. (We are going to be using the .html file extension as more typically recognized on websites.
<?xml version="1.0" encoding="UTF-8"?>
<!DOCTYPE html>
<html xmlns="http://www.w3.org/1999/xhtml" lang="en">
    <head>
        <title>HTML Ex 1</title>
        <meta charset="UTF-8" />
        <meta name="author" content="My Name" />
        <meta name="viewport" content="width=device-width, initial-scale=1.0" />
        <link rel="stylesheet" type="text/css" href="webstyle.css" />
    </head>
    <body>
        <!--Code the viewable portion of your page here.-->
    </body>
</html>
Save your new HTML page in your docs/ directory. Then to publish your work, use the git commands to add, commit, and push your files up to the web (not forgetting the commit message with git commit -m "your message").
Submit the link to your GitHub Pages website on Canvas at the assignment submission point there.