Three.JS Tutorial - Create 3D Environments with HTML and Javascript
Check out an example: Three.js Blog
See other awesome things you can do with three.js: Three.JS examples page
Check out an example: Three.js Blog
See other awesome things you can do with three.js: Three.JS examples page
Node.js and
npm
at the command line.
Note from Dr. B (2023-10-18): This tutorial was originally written with VS Code instead of Webstorm as the code editor. You'll probably see some references to VS Code that we haven't converted over to Webstorm yet--just read around those parts, and we'll try to update them as we go. ALSO, this tutorial is a fresh work in progress, and we'll be debugging it together as we work on it! Thanks for helping catch bugs here! Please report them in the DIGIT-Coder’s Slack #javascript channel!
Node.JS is what makes the Javascript world go round.
"As an asynchronous event-driven JavaScript runtime, Node.js is designed to build scalable network applications." -Node.JS devs
Before downloading Node.JS, you should check to see if you already have it installed in your machine. To do this, we will open our Command Line.
node -v
If you already have Node.JS installed, the terminal will print a version number that looks something like
this:
v0.10.35
If your terminal didn't print a version number, you need to go download Node.JS . (Don't worry, it's completely free - and if you really want to get into Javascript on any level, including professionally, Node.JS is a must-have.)
Now that you have Node.JS installed, allow me to introduce you to the wonderful world of the Node Package Manager (NPM) community. NPM allows brilliant developers to write awesome open-source Node.JS package modules that will allow you to do super cool things with Javascript, including make 3D websites. We need to install NPM at the command line in order to install the Three.JS package.
npm -v
Again, similar to when we checked for node.js, a version number will print if you already have npm installed.
npm install -g npm
Now you're all set to create your new project repository!
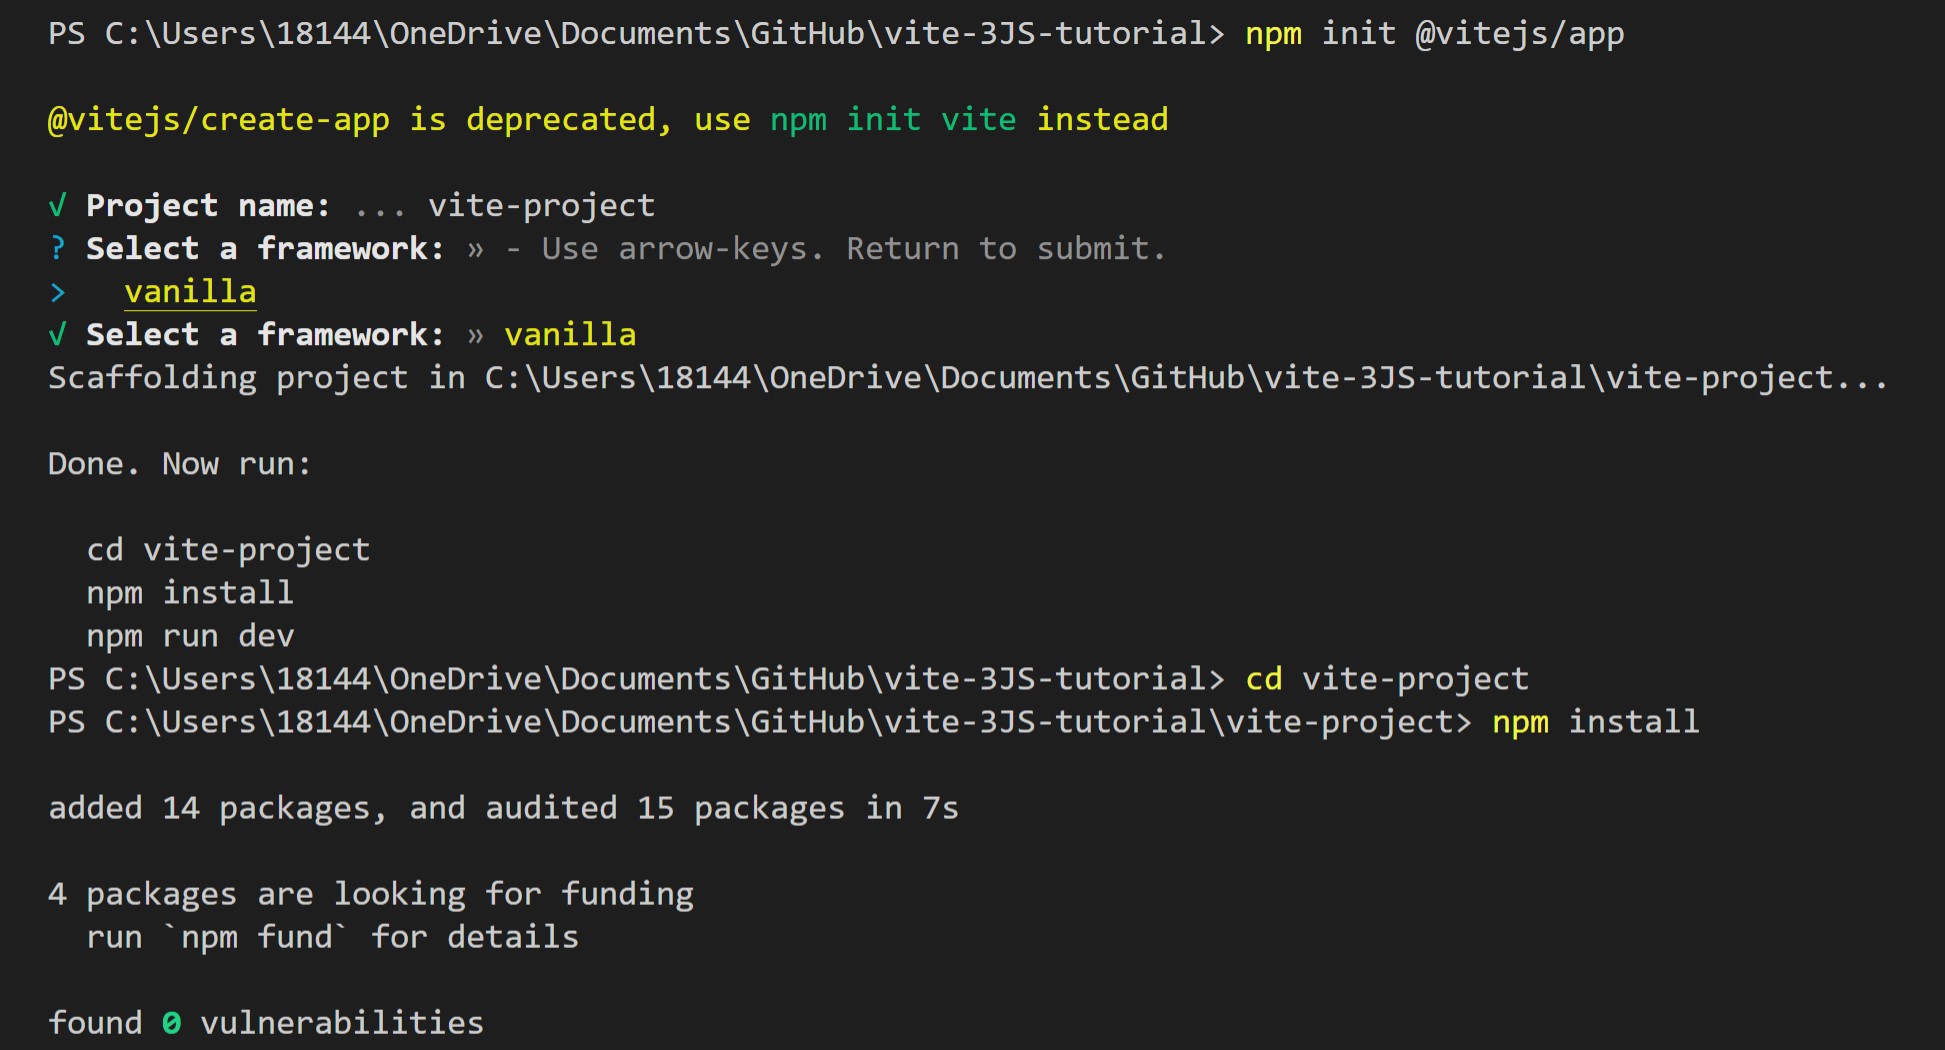
Once you have made your project-container directory, open the command line at your empty directory and enter this command:
npm create vite@latest
Follow the prompts given at command line:
Vanilla framework (yellow)Javascript for the language (yellow)rolldownvite, you can select "N" (though this probably doesn't matter).
This will create a new directory with the name you give you project, and it will contain some new files. On Windows and the arrow keys don't work? Switch to Windows Powershell or Windows terminal, navigate to your new project folder and enter the same commands.
Now, enter these commands separately. The command line terminal prompts these for you when you create your Vite app:
cd your-project-name
npm install
First, make sure you are at the root level of your Vite project directory. Once you cd into it,
enter this command:
npm install --save three
This will install Three.JS as a dependency in your project. You should see a new node_modules
directory, a package.json file, and a
package-lock.json file.
These files and directory contain dependencies that NPM automagically generates for you. Humans do not need to touch them directly, and should never touch them for any reason at all - or you'll destroy the planet. (Not really, actually we will be editing package.json later.) Important: When opening the project in Webstorm, just Open a folder, and do not create a new project, as creating a new project overwrites the good work we did here in installation.
Since Three.JS requires dependencies in order to render, you need to tell your app to run in the command line in order to view it locally.
In the command line terminal, run this command:
npm run dev
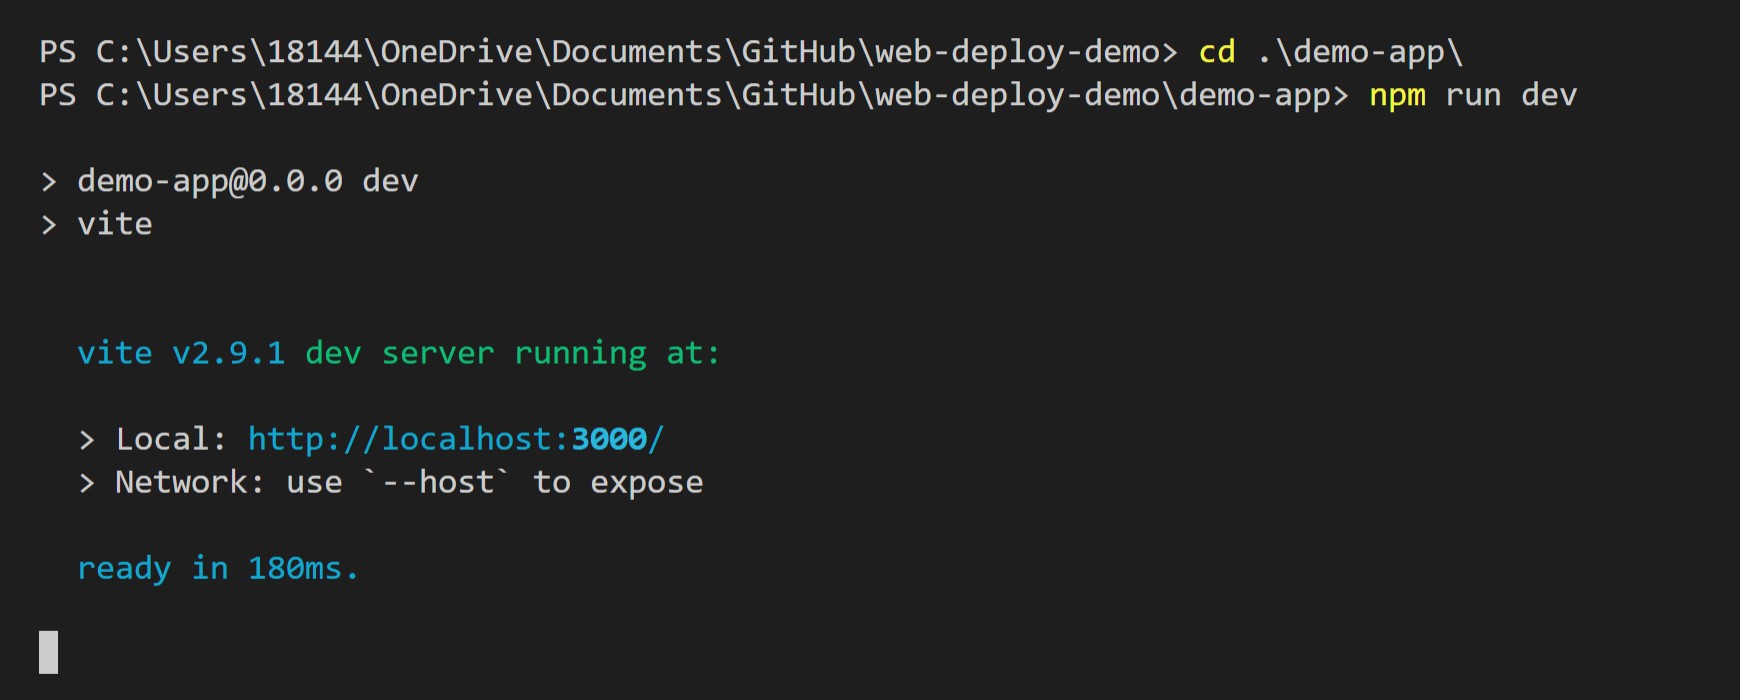
Click the link to your https://localhost:5173 dev server to preview your app, and voila! Your
Vite project
is set up and running locally. (The port number you are given might be different: mine is 5173.)
When you run the command npm run dev, whenever you make new edits to your code, your localhost
browser will automatically refresh and
reflect your changes.
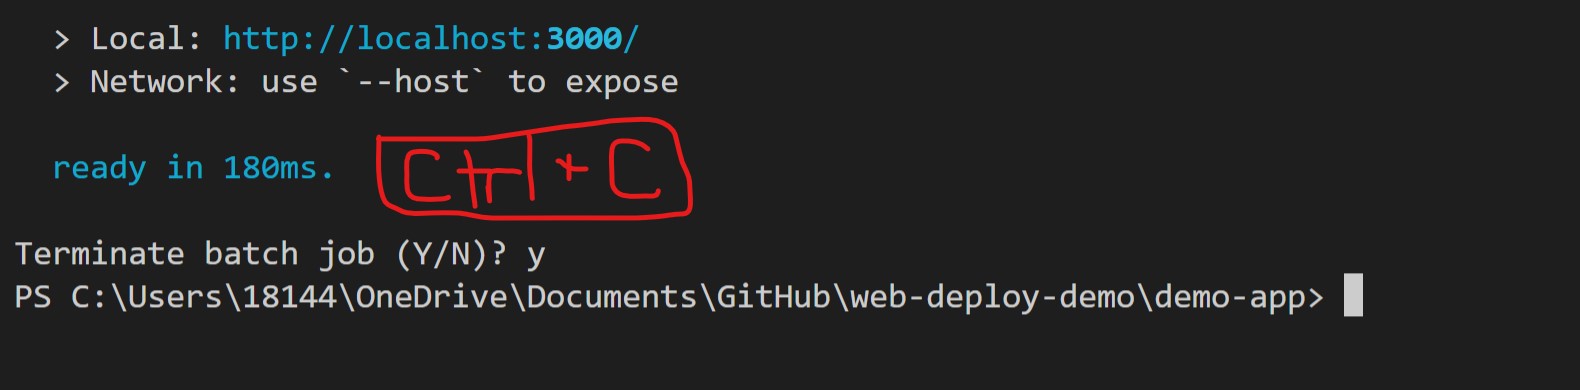
You will not be able to enter any new commands into your terminal until you kill the localhost serve process.
To "kill" or end your dev server process in your command line terminal, simply enter CTRL + C (or CMD + C on Mac) in the terminal.
It will ask you if you want to "Terminate Batch Job". To confirm, type y and hit enter.
At this point, you can open your project in the Webstorm editor, but be careful! When opening the project in Webstorm, just Open a folder, and do NOT create a new project, as creating a new project overwrites the good work we did here in installation. You already have the foundation for your project ready to go, and Webstorm is going to work with what you set up.
You'll need three basic elements in your HTML to render your 3D world:
<canvas> with a unique @id that will literally act as the canvas for
your 3D
objects to live in.<script type="module" src="./main.js"> to connect your HTML to
your
Javascript file with all fo the 3D instructions inside it.<main> to hold the text contents that will float on top of your 3D environment.You should already have the index.html, main.js, and style.css files
you will use to edit in your project, which were generated when you initialized your new Vite app.
Go into your index.html file and change it to look like this:
<!DOCTYPE html>
        <html>
        <head>
            <title>Three JS Demo</title>
            <meta charset="UTF-8" />
            <meta name="viewport" content="width=device-width, initial-scale=1.0" />
             <link rel="stylesheet" type="text/css" href="style.css" />
        </head>
        <body>
            <canvas id="bg"></canvas>
            <script type="module" src="main.js"></script>
        </body>
        </html>
In the same directory as your index.html file, you should find a CSS file called style.css.
Write
the following code into that CSS to make the <canvas> element in your HTML be the
background
for your site:
canvas{
          position:fixed;
          top: 0;
          left: 0;
        }
This is where your 3D objects will appear when we start creating them in your javascript.
In your new main.js javascript file, you'll need to tell it to import the Three.JS node package
module in order to reference the many pre-built 3D-building methods and objects.
To do this, simply paste these import instructions on the first line of your JS file:
import * as THREE from 'three';
Helpful Three.JS documentation in case you need it
You need three main components to set up your Three.JS scene:
We create these objects by declaring a new const, a type of variable in Javascript, and defining
it
with new THREE methods.
// Setup

        const scene = new THREE.Scene();

        const camera = new THREE.PerspectiveCamera(75, window.innerWidth / window.innerHeight, 0.1, 1000);


        // create a new renderer by instating the canvas element in our HTML // file
        const renderer = new THREE.WebGLRenderer({
          canvas: document.querySelector('#bg'),
        });
You will not be able to view your new scene until you tell the renderer to render the scene and the camera
with
Three.js's .render method:
renderer.render(scene, camera);
Now that we have each of these objects set as constants, we can manipulate them with Three.JS's built-in methods.
Let's set the pixel ratio, the size, and the camera position:
renderer.setPixelRatio(window.devicePixelRatio);
        renderer.setSize(window.innerWidth, window.innerHeight);
        camera.position.setZ(50);
        camera.position.setX(-3);
Now that our scene is set up, we can add 3D objects!
There are three basic components you need in order to create a 3D object in Three.JS:
We need to create new const variabels for each of these components so that we may manipulate
them
and add the final mesh to our scene.
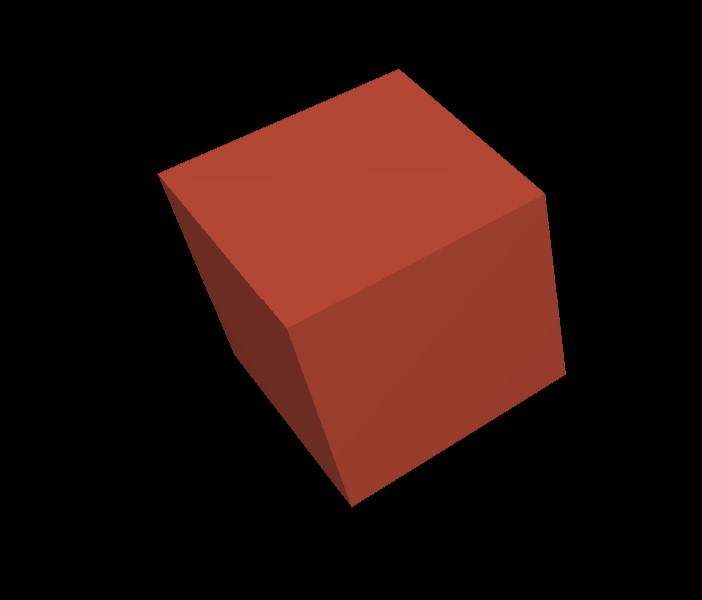
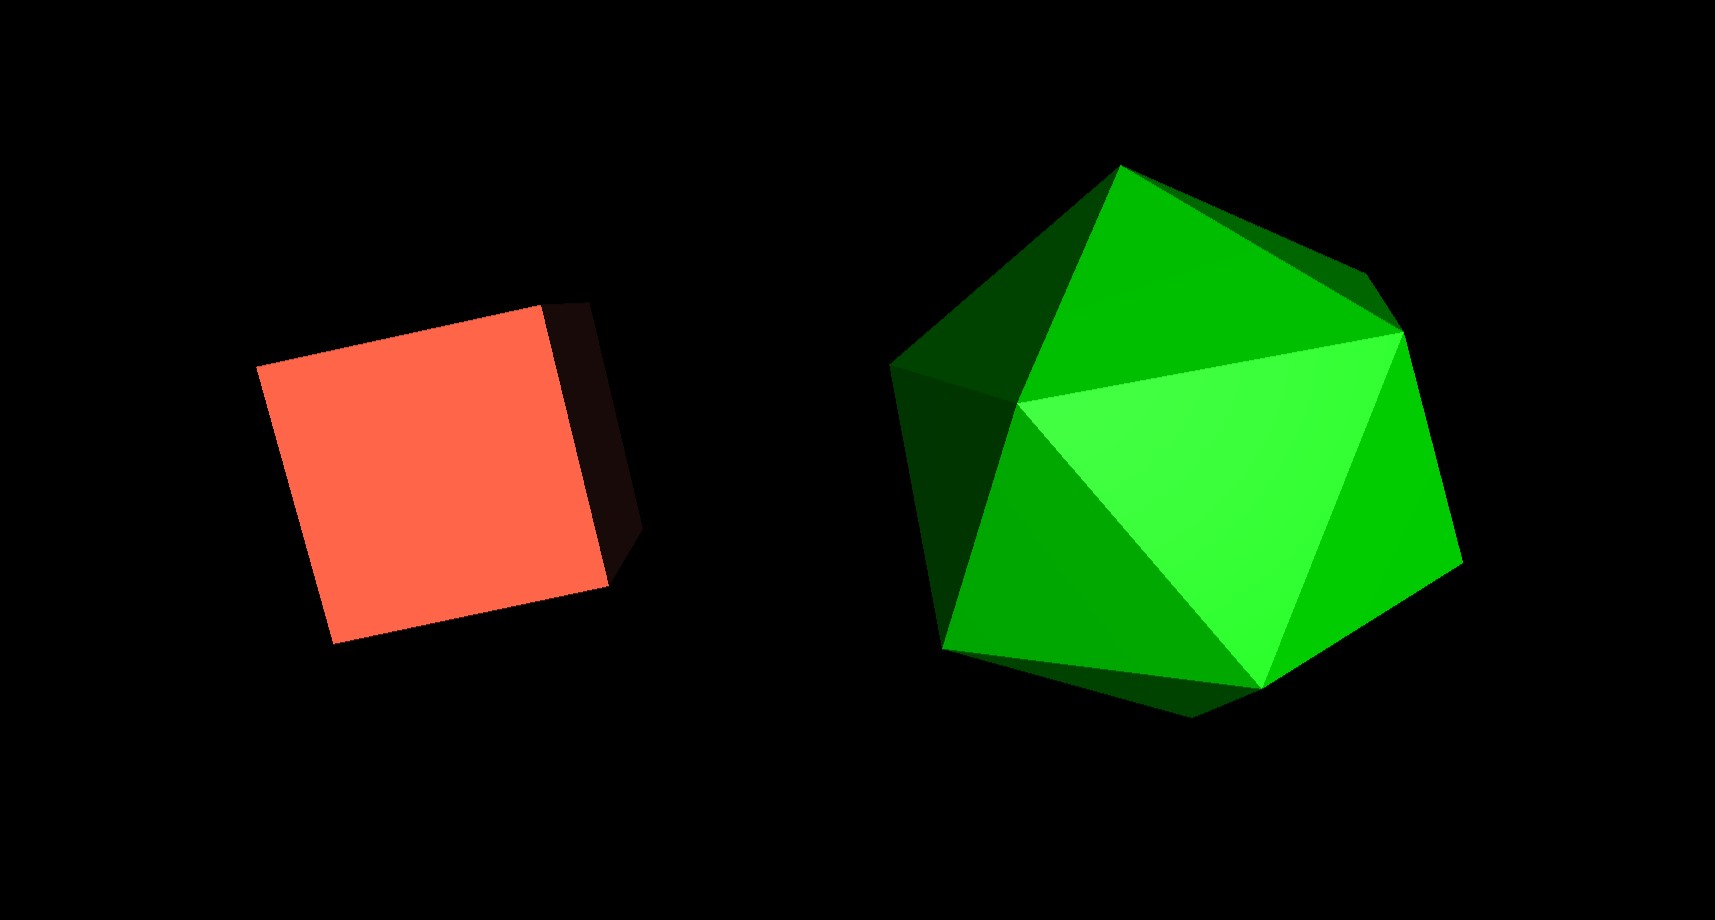
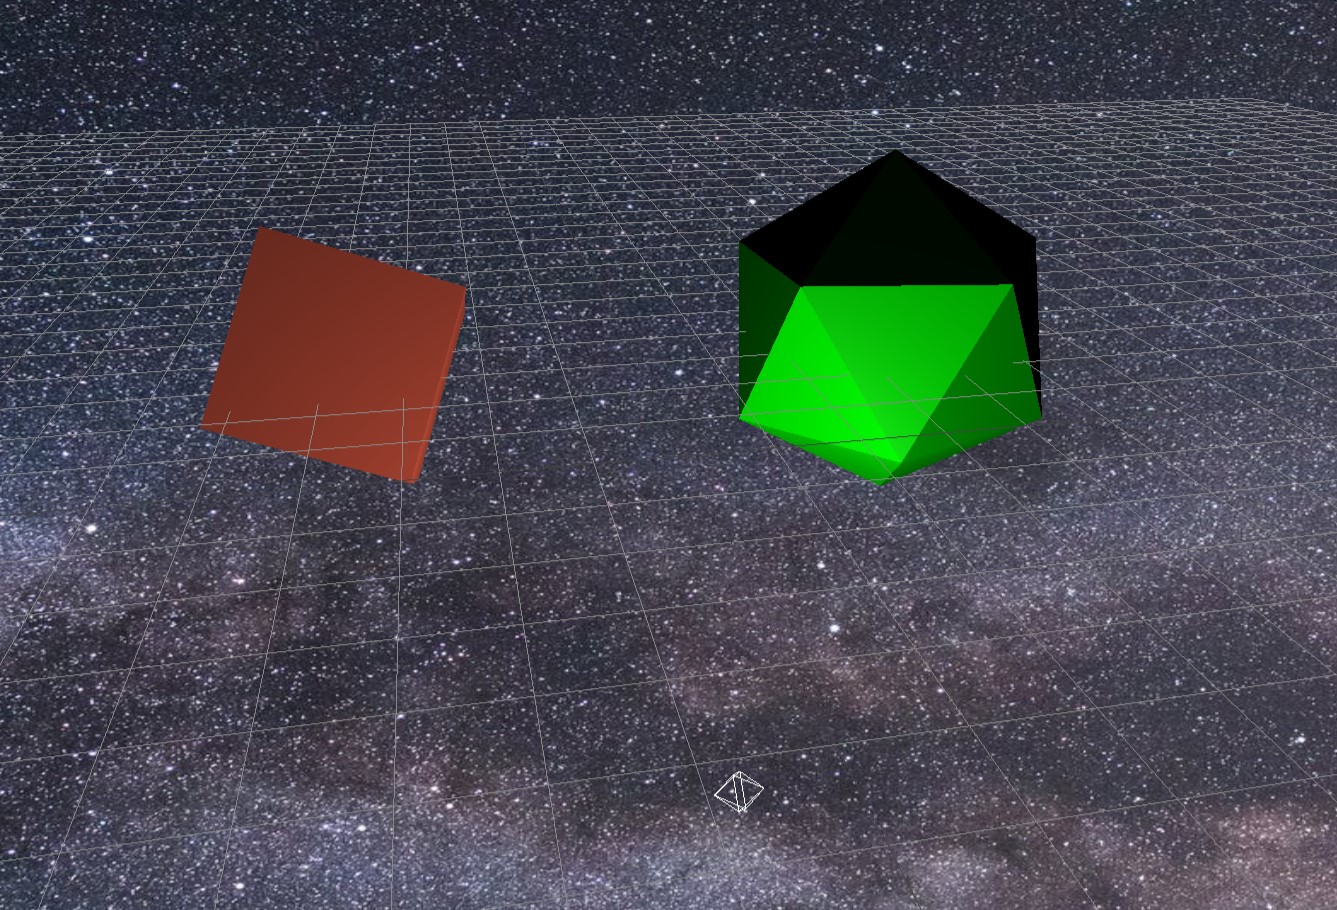
Let's create a basic cube.
() as arguments separated by commas:const geometry = new THREE.BoxGeometry(10, 10, 10);
//set the color of the basic material in the object parameters `{}`
const material = new THREE.MeshBasicMaterial( { color: 0xFF6347 } );
const cube = new THREE.Mesh( geometry, material );
To add our cube into the scene, use the .add() method.
scene.add( cube );
You can change the position of the object by manipulating the cube's .position property and
attaching the axis on which you want to move it:
cube.position.z = -15;
        cube.position.x = -15;
Change the rotation of your object by manipulating the .rotation property and attaching the axis
on
which you wish to rotate it:
cube.rotation.x = 2;
        cube.rotation.y = .5;
Three.JS allows you to create objects with a wide variety of customizable material types and textures. Some
material types require lights in the scene in order to be visible, including the Phong
material.
Your cube is visible because it is made of a Basic material, which is not affected by lights.
Let's create a new object to test out new materials:
const ico = new THREE.IcosahedronGeometry(10);
        const icoMaterial = new THREE.MeshPhongMaterial({ color: 0x00ff00 });
        const icoMesh = new THREE.Mesh(ico, icoMaterial);

        scene.add(icoMesh);

        icoMesh.position.z= -15;
        icoMesh.position.x= 15;
If you try to view your new object in the browser, you will not be able to see it. Since Phong materials require light, you will need to at least one light object in your scene:
// Lights

        const pointLight = new THREE.PointLight(0xffffff);
        pointLight.position.set(0, -10, 10);

        const ambientLight = new THREE.AmbientLight(0xffffff);
        ambientLight.position.set(25, -15, -400);

        scene.add(pointLight);
        scene.add(ambientLight);
Point Lights are lights that only go in one direction.
Ambient lights act more like the sun, spreading light in all directions.
You can change the color of the light by manipulating the HEX code value of the new THREE.Light() object within the parentheses.
Watch what happens if you change your cube material to a StandardMaterial which
accepts
light, replacing it with BasicMaterial , which does not accept light:
const material = new THREE.MeshStandardMaterial( { color: 0xFF6347 } );
To make your objects move through time, we need to create a new animate function and set our
animation properties within it.
You can animate just about any property of an object you want.
function animate() {
            requestAnimationFrame( animate );
        // slowly rotate the cube:
        cube.rotation.x += 0.01;
        cube.rotation.y += 0.01;
        // rotate the icosahedron a little faster in the opposite direction:
        icoMesh.rotation.z += -0.03
        icoMesh.rotation.y += -0.03

            renderer.render( scene, camera );
        }
You must call the animate() function in order to tell the browser to use it:
animate();
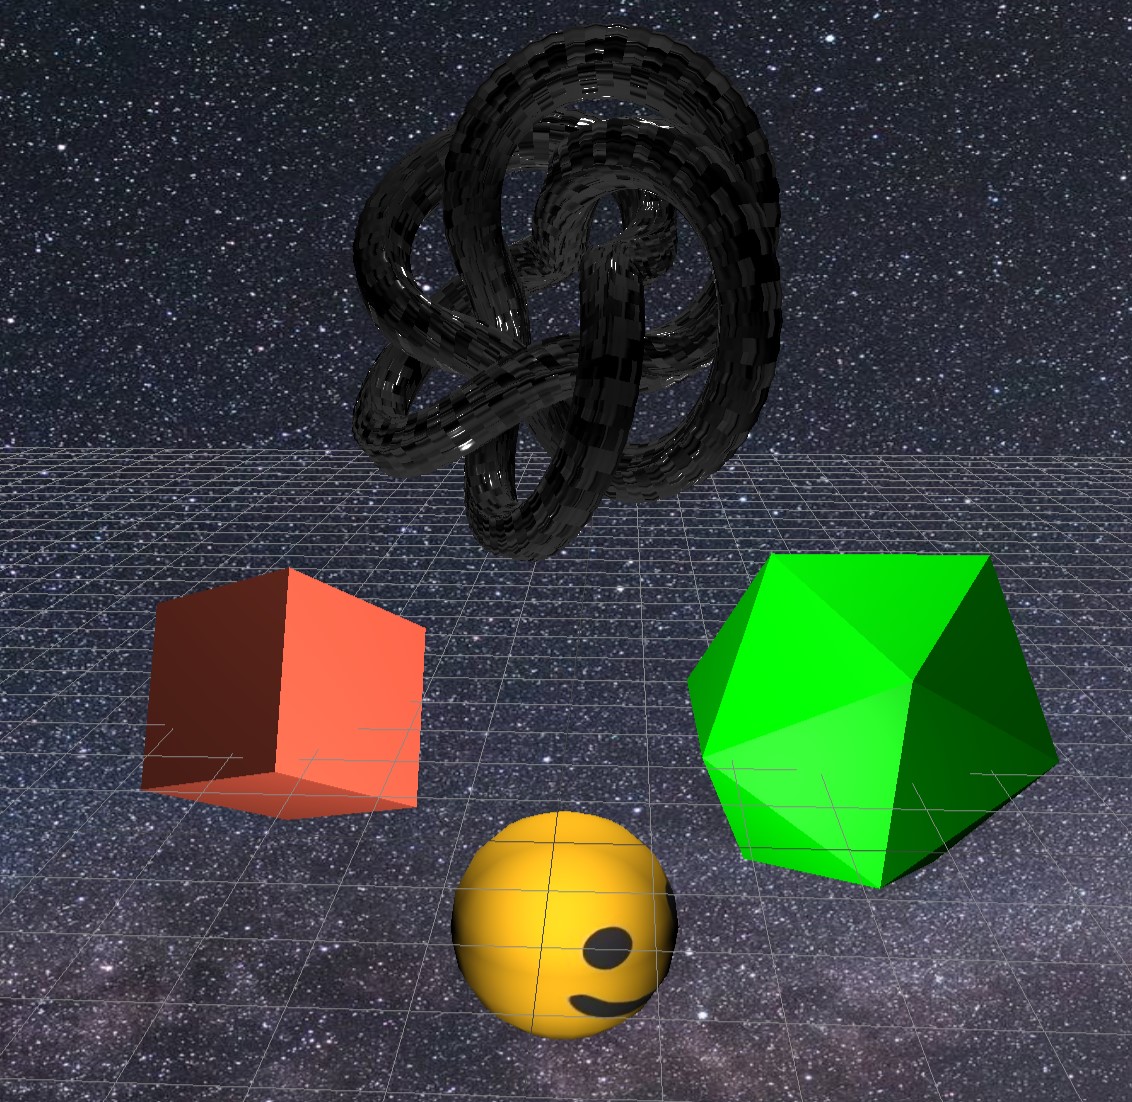
Congratulations! Your scene should now look something like this:
Three.JS comes with a wide variety of scene helpers to assist in orienting the view of your scene.
We can add a Light Helper, which shows us where in the scene our light objects are positioned.
Let's add a light helper to our pointLight object:
// Helpers

        const lightHelper = new THREE.PointLightHelper(pointLight);

        scene.add(lightHelper)
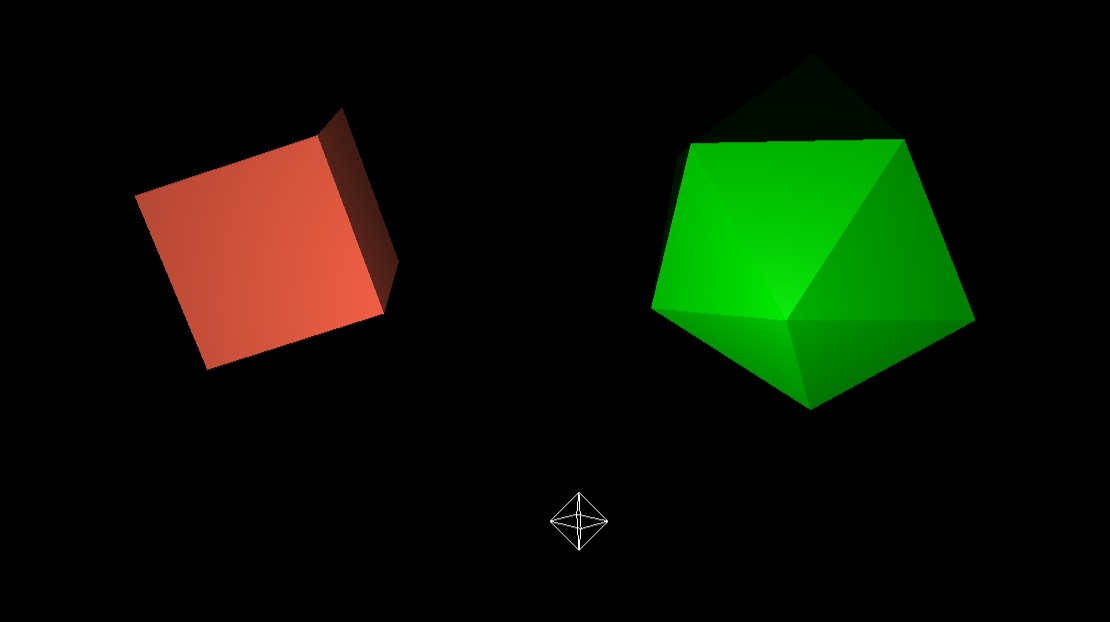
We can also add a Grid Helper to show the 3D axes of our scene.
const gridHelper = new THREE.GridHelper(200,50);

        scene.add(gridHelper)
Three.JS has various types of Control methods to allow you to add interactive functionality to your scene.
Let's add an Orbit Control, which will allow us to move our camera and traverse our scene with
mouse
controls and zoom.
In order to add the Orbit Controls as a function, we need to import that package from the three.js
dependencies.
At the top of your document where you imported THREE.JS, (directly underneath
import * as THREE from 'three';) add this line of code:
import { OrbitControls } from 'three/examples/jsm/controls/OrbitControls';
Then, under your Helpers, activate your orbit controls by declaring it as a constant:
// Orbit Control

        const controls = new OrbitControls(camera, renderer.domElement)
Your orbit controls will not be functional until you add an .update() method to your new
controls object WITHIN your animate(){} function:
function animate() {
            requestAnimationFrame( animate );
        // slowly rotate the cube:
        cube.rotation.x += 0.01;
        cube.rotation.y += 0.01;
        // rotate the icosahedron a little faster in the opposite direction:
        icoMesh.rotation.z += -0.03
        icoMesh.rotation.y += -0.03
        // ALLOWS YOUR ORBIT CONTROLS TO UPDATE LIVE IN REAL-TIME:
        controls.update()

            renderer.render( scene, camera );
        }
When you refresh your server, you should now be able to click and drag to orbit the camera view of your scene!
We can set our scene backgrounds to whatever we want, using regular image files.
create a new folder in your project and name it images
find a cool, high-resolution image that you'd like to appear as the background of your scene. We are using this one:

save the image file of your choosing inside your new /images directory.
create a new Texture object by referencing your image, and add it to the scene:
// Background

        const spaceTexture = new THREE.TextureLoader().load('images/night_sky.jpg')

        scene.background = spaceTexture;
In the world of 3D modeling, Texture Mapping refers to mapping flat images onto the surface of a
3D
object. Three.JS allows us to do this by creating Texture objects and applying them to our 3D
objects using methods.
Find an image file that you'd like to apply to the surface of a new object. We will be using this one:

Save your texture image file in your /images directory.
Now, in our main.js, let's create a new texture that we will map onto a new object:
// Object texture mapping

        const smileTexture = new THREE.TextureLoader().load('images/smile.jpg')
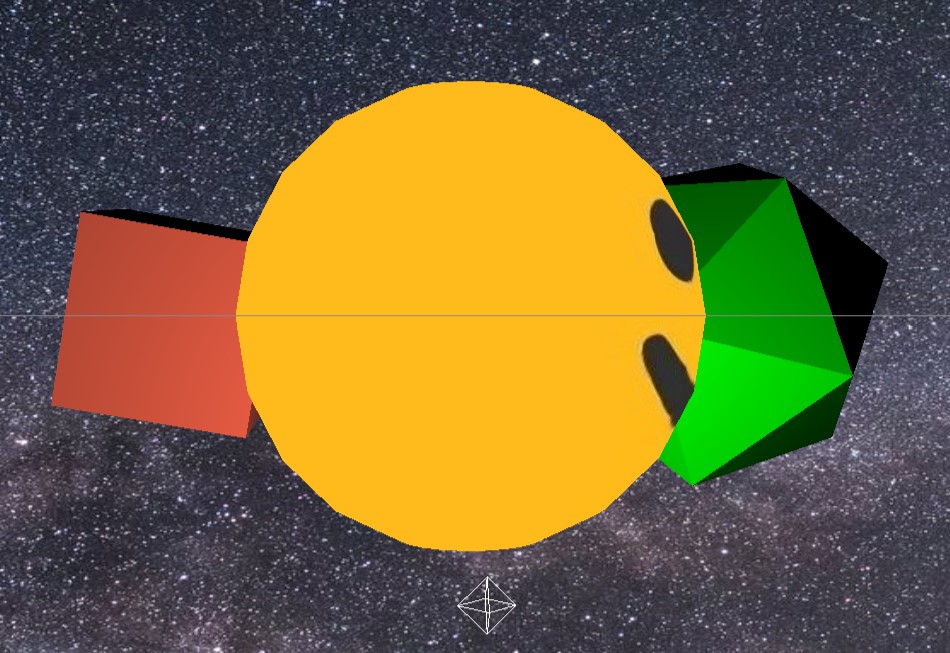
Now, let's create a new Sphere object to map our new texture onto.
Remember new objects require three basic components:
geometrymaterial
BasicMaterial will have a value of
{map: smileTexture} instead of a color hex code.
mesh, which combines the geometry and material to create the
final
visible object.// Object texture mapping
const smileTexture = new THREE.TextureLoader().load('images/smile.jpg')
const sphereGeometry = new THREE.SphereGeometry( 10, 22, 10 );
const smileMaterial = new THREE.MeshBasicMaterial({map: smileTexture})
const smileMesh = new THREE.Mesh(sphereGeometry, smileMaterial);
scene.add(smileMesh);
You can manipulate the object's static position, rotation, and size as you wish, the same as your other objects.
You can also add property changes to this new texture to be animated in real-time in your
animate()
function:
function animate() {
            requestAnimationFrame( animate );
        // slowly rotate the cube:
        cube.rotation.x += 0.01;
        cube.rotation.y += 0.01;
        // rotate the icosahedron a little faster in the opposite direction:
        icoMesh.rotation.z += -0.03
        icoMesh.rotation.y += -0.03
        // rotate the smiley sphere on the Y axis:
        smileMesh.rotation.y += 0.05
        controls.update()

            renderer.render( scene, camera );
        }
Three.JS also allows you to create vivid textures to alter the surface shape of your mesh to create real, light-reactive textures on your objects.
To do this, we need to create a normal.
Normal mapping in the 3D world refers to a texture mapping technique used for faking the lighting of bumps and dents – an implementation of bump mapping. It is used to add details without using more polygons.
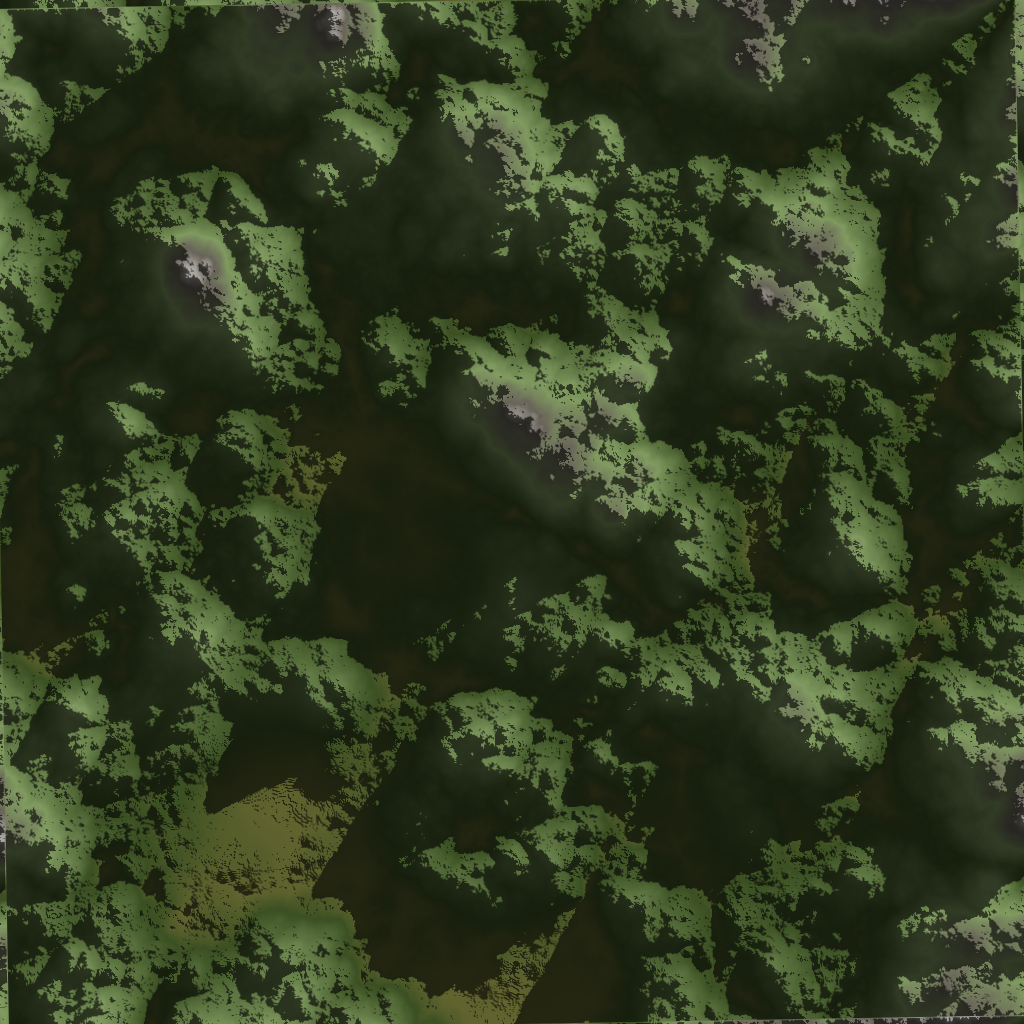
To create a "normal", you must first find a texture image you like that can be converted into a "normal".
We used this site to generate and customize a texture: Texture Generator Online
Here's the texture we generated:
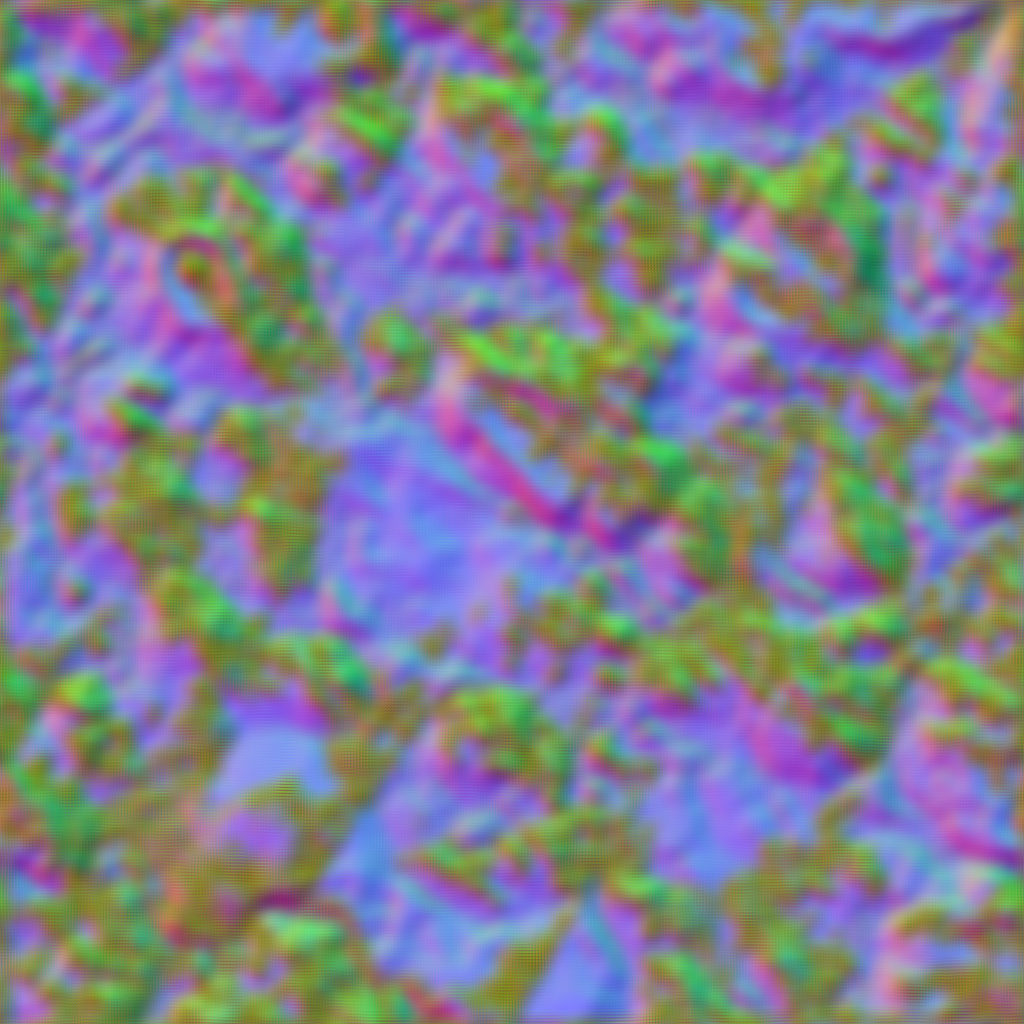
Now, we must convert this texture image file into a normal map. We used this site to upload our texture image file and have it converted into a normal: Normal Map Online
Here's the normal map that was generated from our image:
Now we need to create a new normalTexture object in our Javascript by loading a new texture and
loading in our normalMap image file:
const normalTexture = new THREE.TextureLoader().load('images/normals/textureNormal.png');
Now, to apply our normal map to a new object, we must apply our normal map image to the
normalMap
property within our new MeshStandardMaterial.
// Normal Texture Map

        const torusGeo = new THREE.TorusKnotGeometry( 5, 1, 250, 5, 9, 15 );
        const torusMaterial = new THREE.MeshStandardMaterial( {
          normalMap: normalTexture,
          roughness: 0,
          metalness: .8
        } );

        const torusKnot = new THREE.Mesh( torusGeo, torusMaterial );

        scene.add( torusKnot );
        torusKnot.position.y = 20
We also added a roughness and metalness property value to make our new object look
more
shiny and reflect light. Your scene should look something like this:
Now comes the fun part.
To deploy your three.JS app on GitHub Pages and display it to the world, we need to create a production folder in your main repository branch, and create a deployment branch that will point directly to your static production folder files.
Here are the steps you must follow:
Create a new folder in your project root. Name it dist.
Move the following files inside the new dist folder:
/images folder containing your image files that you are using for your meshes and
scene backgrounds.We need to make a change to the files in the dist folder so that GitHub Pages can access the Three JS library. (Explanation: We can't install three.js on GitHub's servers and it is only running in our local computer environment. But there are cloud service providers who can make the Three.JS library available in the GitHub environment, too. We are going to add them here.)
Look the dist folder and locate your main.js file. Open that dist/main.js file and edit the top lines that handle the three.js library import so they look like this:
import * as THREE from 'https://cdn.skypack.dev/three@0.128.0/build/three.module.js';
import { OrbitControls } from 'https://cdn.skypack.dev/three@0.128.0/examples/jsm/controls/OrbitControls.js';
import { GLTFLoader } from 'https://cdn.skypack.dev/three@0.128.0/examples/jsm/loaders/GLTFLoader.js';
(You may find yourself needing more or different links to the CDN (content-delivery-network) service. Check out
the Three.JS installation documentation for more details and some other
alternatives.
Within your package.json file, add the fillowing line of code inside your
"scripts":
"deploy": "gh-pages -d dist"
Your "scripts" JSON should now look like this:
            "scripts": {
                "test": "echo \"Error: no test specified\" && exit 1",
                "deploy": "gh-pages -d dist"
           }
Make sure you are at the root of your project directory. Run the following command in your project to install gh-pages:
npm install gh-pages
gh-pages is an npm package that allows you to publish files to a branch named "gh-pages" on GitHub. You may read more about it here - https://www.npmjs.com/package/gh-pages
Now we just need to push the project to a new repository on GitHub. Go to GitHub.com and create a new repository.
Fill in your repository name and a short description. Tip: try naming your remote repo the same as what you named your Three.JS project lcoally.
You do not need to add a readme, a gitignore, or a license.
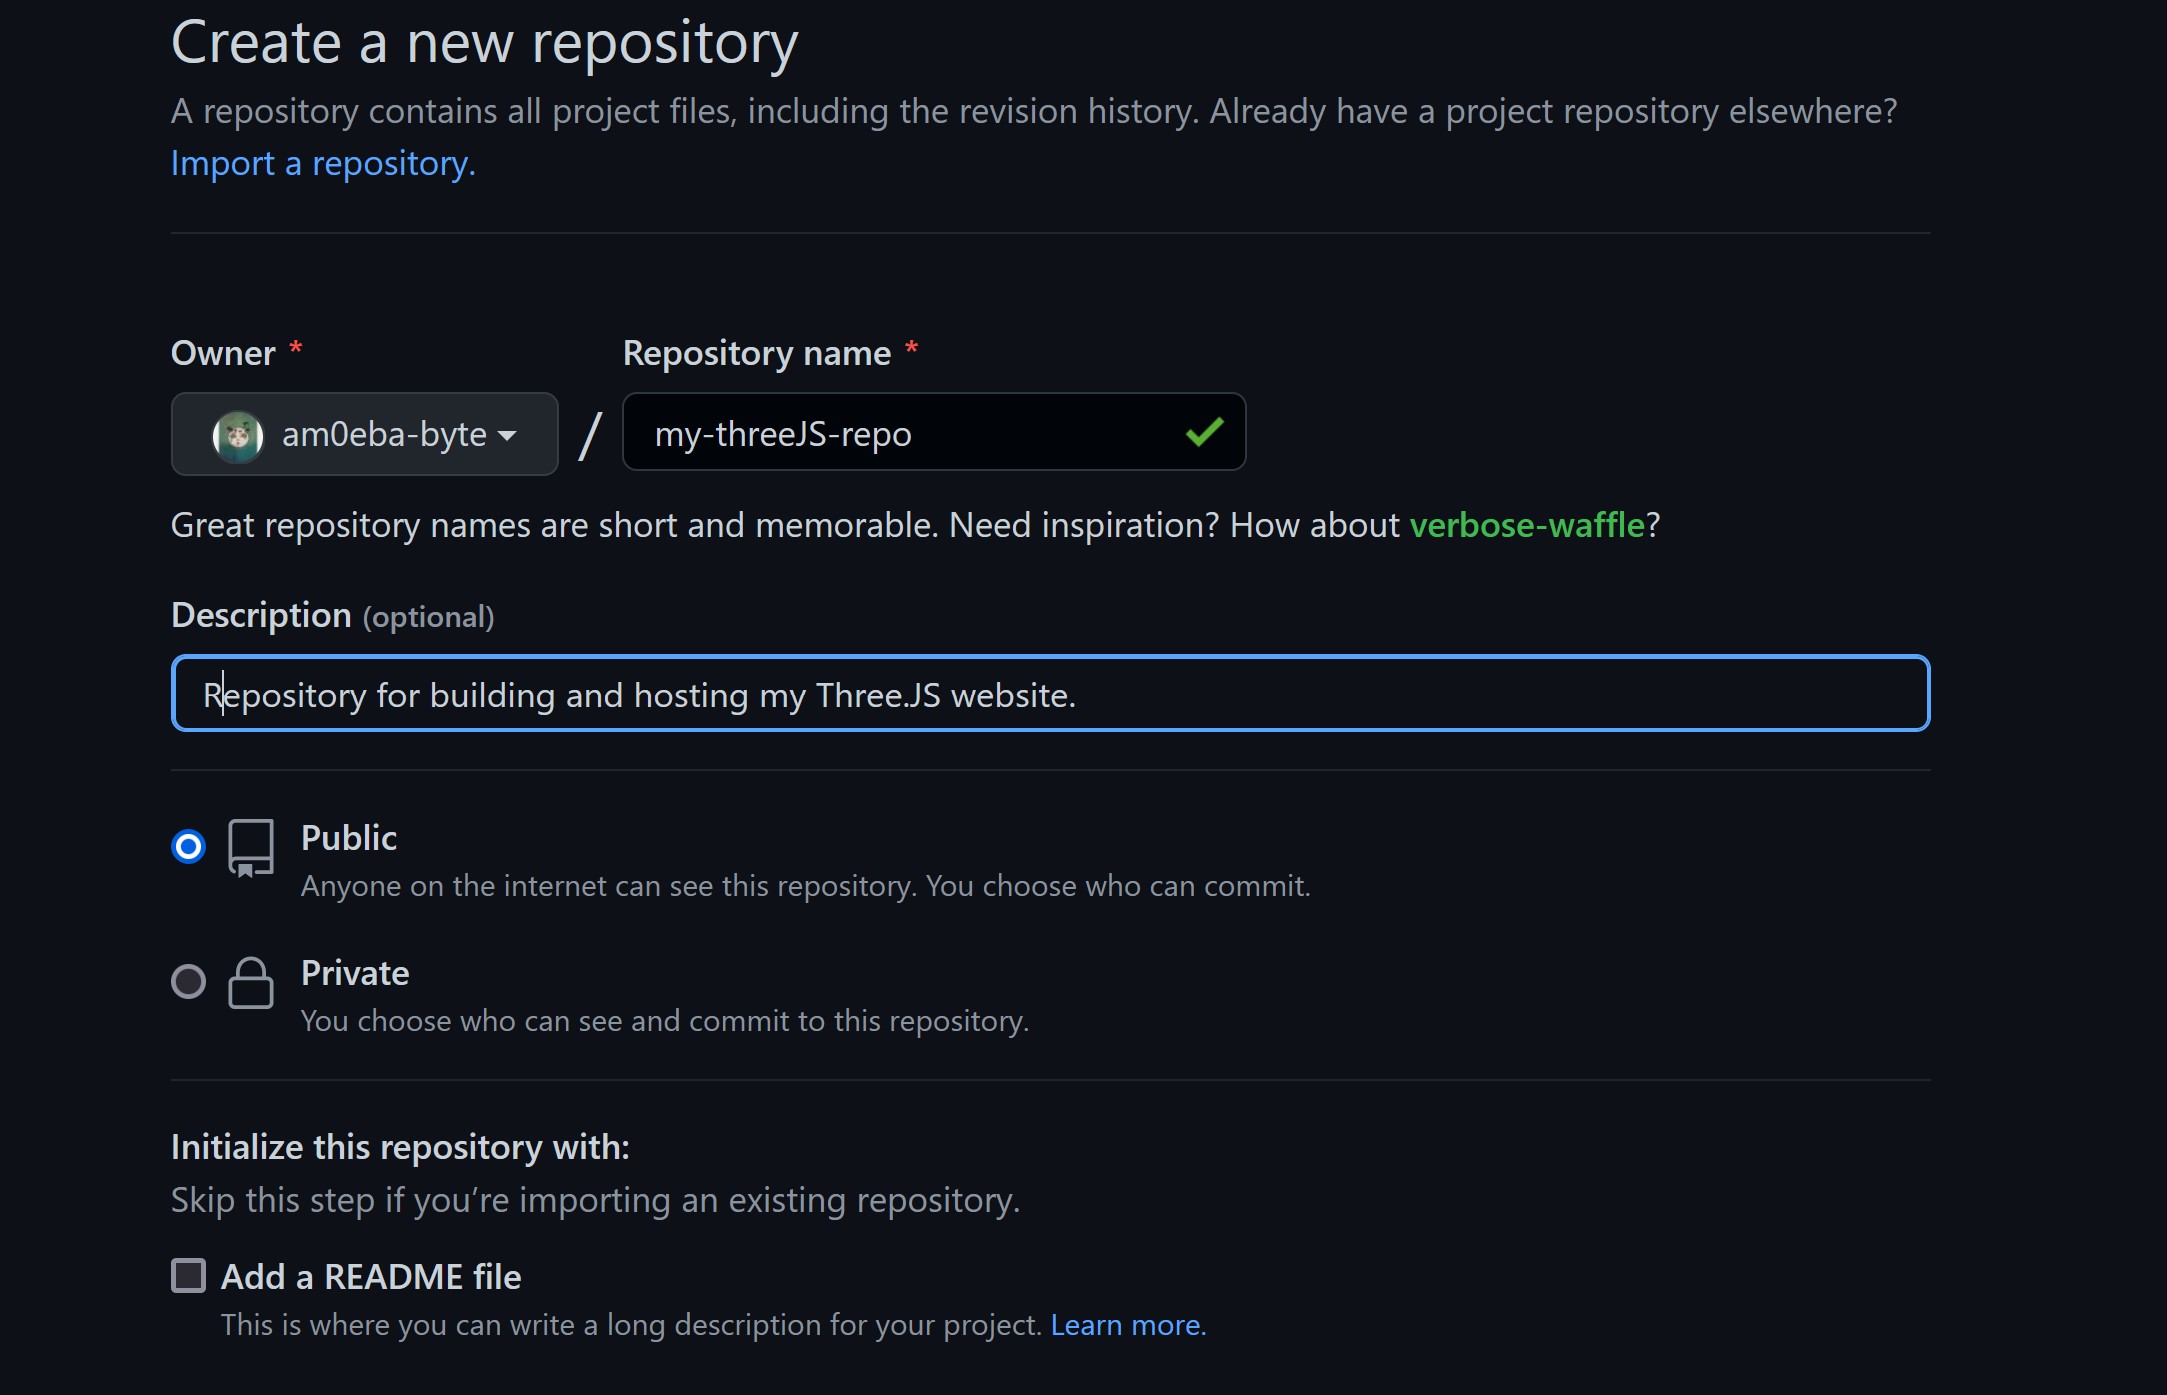
Hit "Create Repository".
Once you get to this page, STOP! Keep this page open in your browser. We need to go back into your command line terminal to push your project code into this new remote repository.
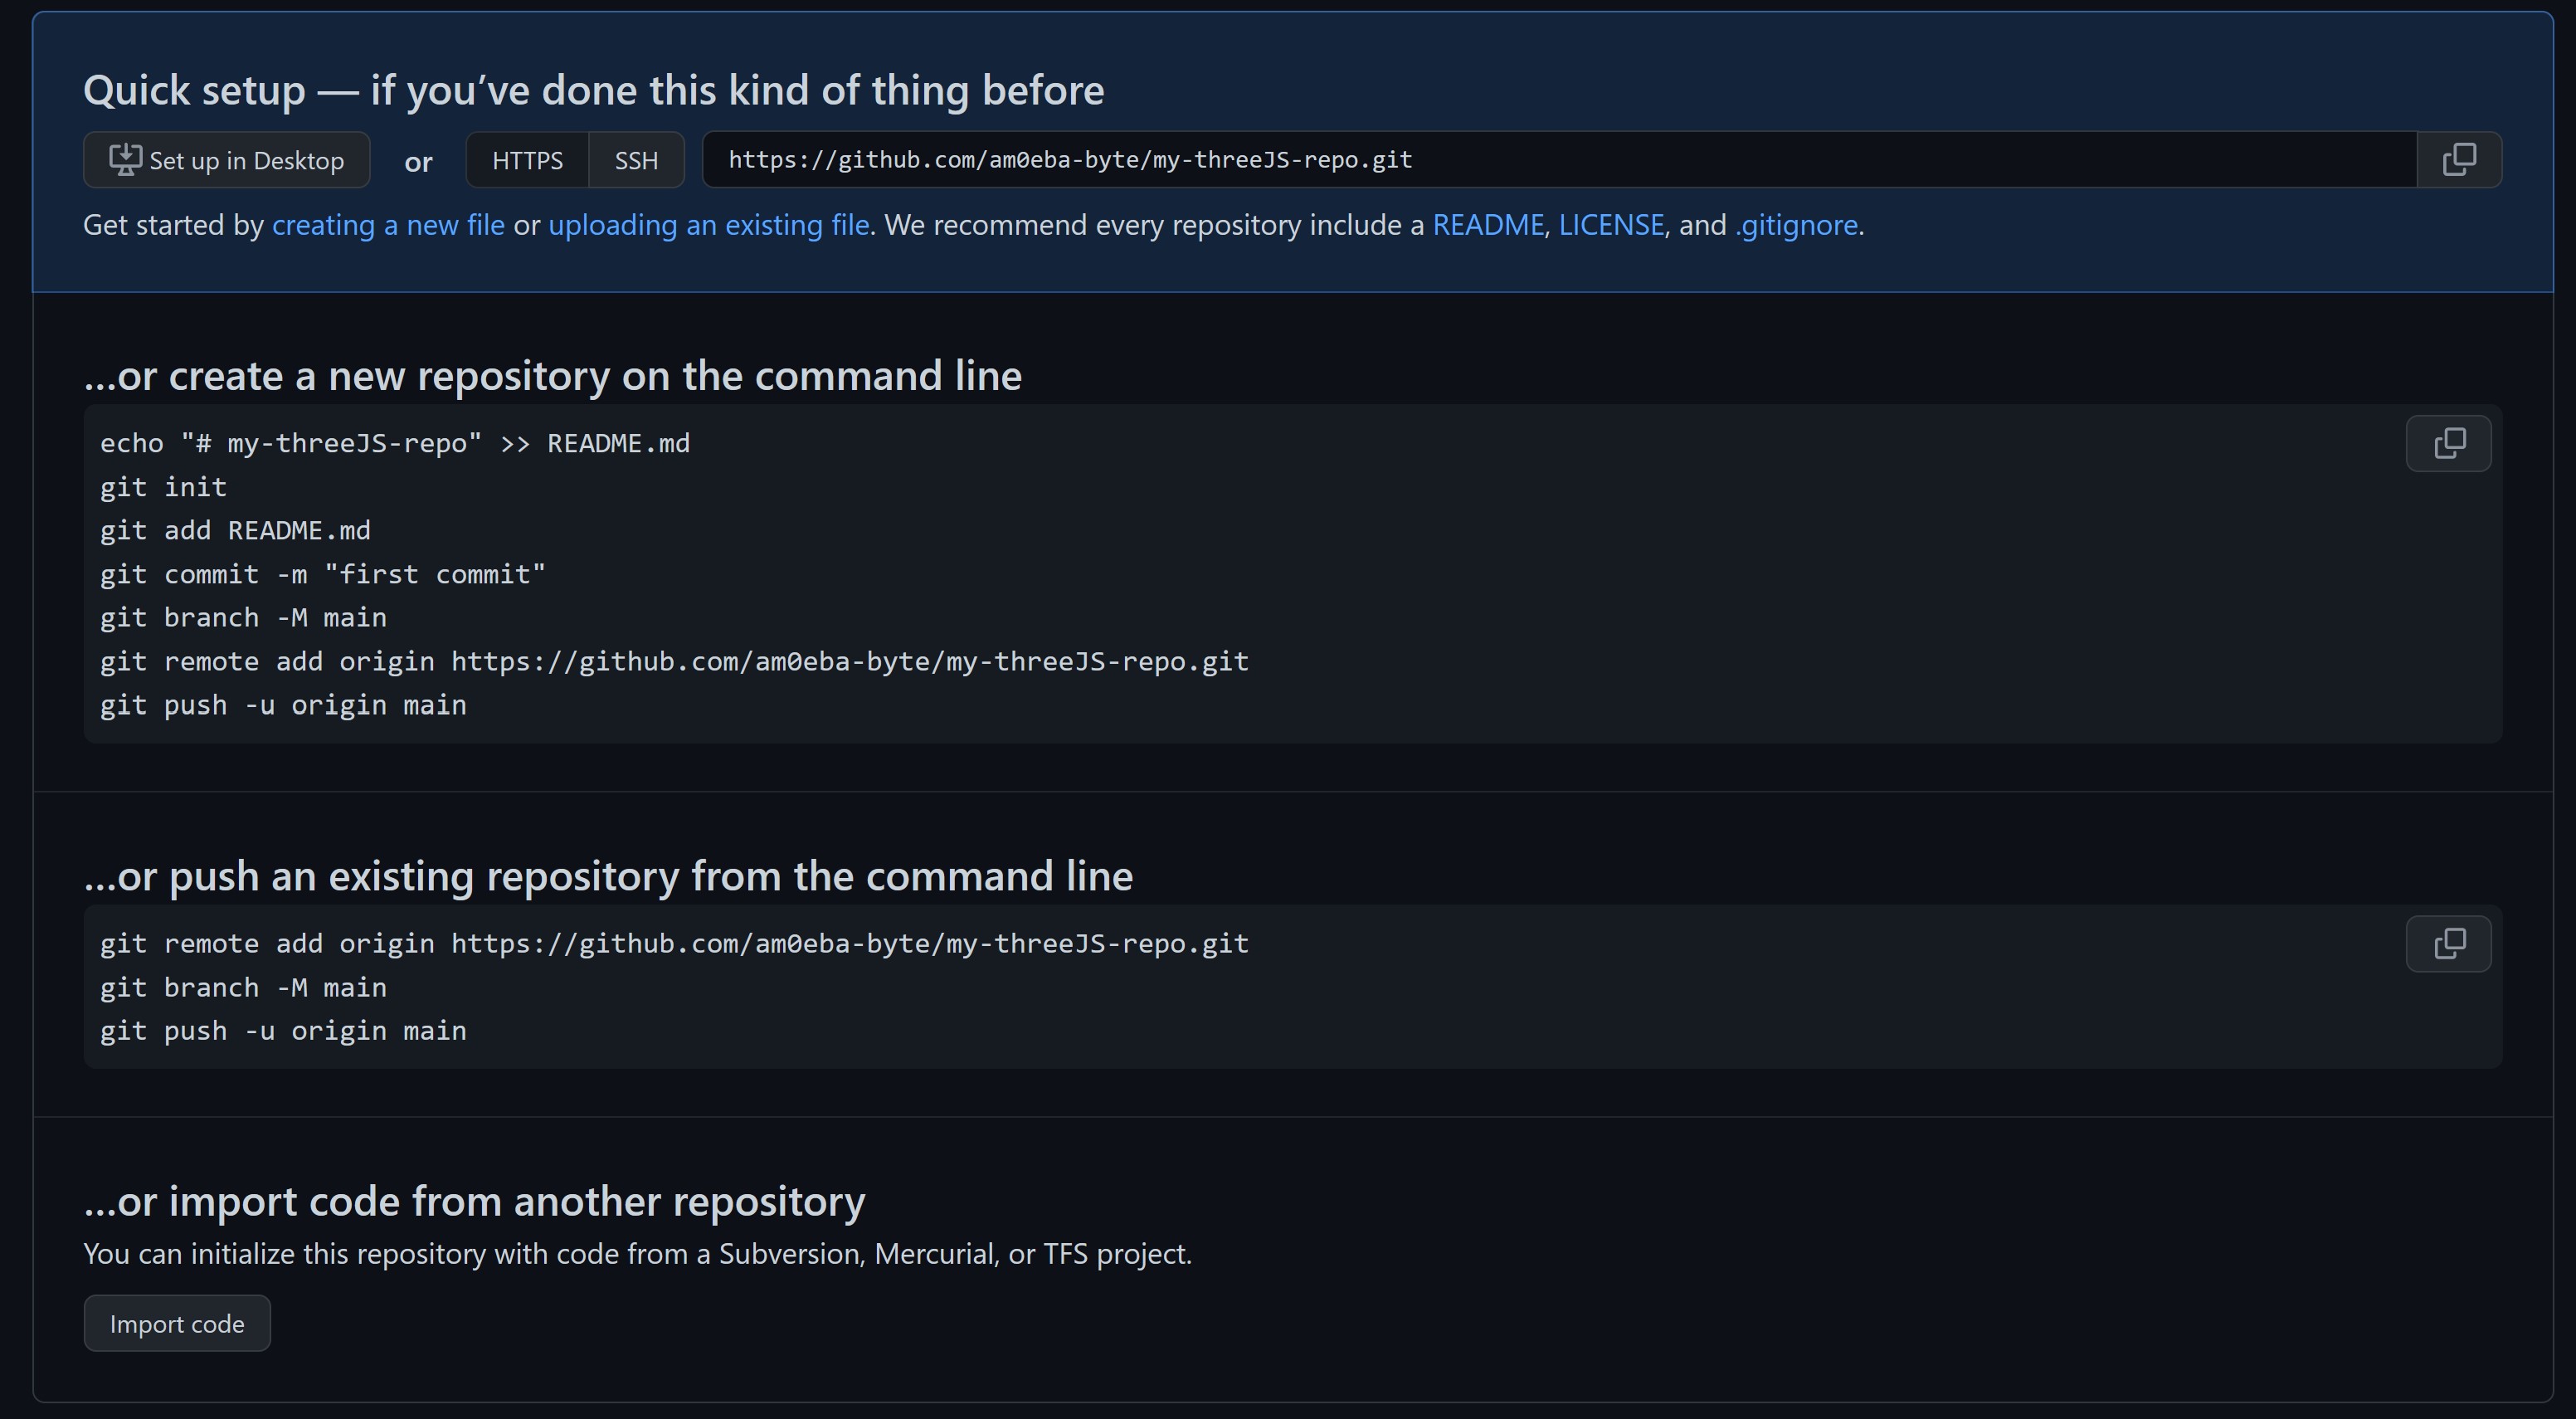
git init
git remote add origin "YOUR_REPOSITORY_URL"
git add .
git commit -m "YOUR_COMMIT_MESSAGE"
git push origin main
Once all your code is pushed to the master branch, go to your repo on GitHub.com
and create a new branch. Name it “gh-pages”.
Make sure you are at the root of your project directory, then run this command in your terminal:
npm run deploy
This step runs the “deploy” script that you added in Step 3.

Once your terminal says "Published", you need to wait a few minutes for your GitHub Pages site to be ready for viewing.
After a few minutes, go to the "Pages" tab in your repository settings, and your website link will be there.